So I decided to blog my experiments and hunt down some tutorials to try them out, but instead I found a tutorial using some perfect pearls and as I have had some sitting around for a year unused I decided to start there.
So here goes I don't have the best colour assortment as you can see but my main aim is to learn new techniques for using them. and applying them to my jewellery.
 |
| My perfect pearls |
 |
| Perfect pearls mixed into the clay |
 |
| Perfect pearls applied to the outside of the clay |
Next I took some scrap clay and stamped three tiles. First I applied the perfect pearls again by using a brush and colouring the sections of the stamped clay, can't really say I'm all too keen on this method though with better suited colours a nicer blend could probably be achieved.
On the second tile I stamped the scrap with perfect medium lightly over the tile and applied just the green to the stamped area and then vigorously brushed off any remaining powder from the tile. The stamped area is very faint, a bit foggy where some powder has stuck to the clay and I like what is ultimately trying to be achieved but I think more tests are need with this method, being to try white and black clay but also a pre-cooked tile of clay as I wonder if the powder would come away so much easier.
Lastly I added the perfect pearls to some water and created a paint which was applied to the stamped area. Of the three this is my favourite the colours are a beautiful metallic, definitely one for my to do list.
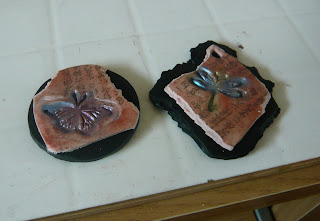
Finally I searched for some tutorials for perfect pearls and decided to have a go at this one here on the Polyform Website Dry Erase Tile Board. Now as jewellery is more my thing and I like to find ways in which techniques can be used to make jewellery, I obviously didn't make the tile, instead I made a sheet of clay using the methods from the tutorial and here are my finished pieces.
I tore the sheets of my clay and applied them to a black background, I am really pleased with the results and I hope to make some lovely pendants from these, The backs have just been applied so now they just need sanding and buffing.


I love seeing people experimenting ... it looks like you had fun :-)
ReplyDeleteI really love those last two, especially the one with the script and the stamped dragonfly.
Thank you yes the bottom two are my favourites too on the dragonfly fly here is used the pearfect perals mixed with water which gave it more of an outline to the top two where the perfect pearls was used dry to colour the stamp
ReplyDelete