Following on from last weeks post ... Here is Part Two of creating and finishing my handcrafted Ribbon Necklace
12.00pm Its time to sand and buff my beads, I use three grades of sandpaper and warm water with a tiny amount of washing up liquid, to give each bead a good sanding
 |
| three grades of sandpaper are used on my beads |
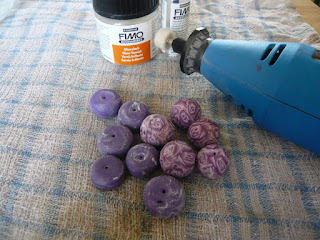
12.35pm Once the beads have been sanded they need to be buffed firstly with denim as this helps to remove any remaining dust and residue from the bead and lastly with my hobby tool to create a beautiful matte shine ready for varnishing.
 |
| Buffing my beads with my hobby tool |
1.0pm Once varnished the beads must be given time to dry.
6.20pm Back again ! The beads are now dry and are ready to be assembled to create the finished necklace.
 | ||
| Everything I need ready for finishing my necklace |
The necklace is carefully strung together with ribbon with each bead secured into place
 |
| Curling the ribbon and securing each bead |
7.45pm And here it is my completed handcrafted necklace, in all to create this piece it took me a total of 2 days to complete allowing for breaks in between when the beads needed cooling or drying.
Lilac Ribbon Rose Necklace
 |
| Lilac Ribbon Rose Necklace |
 | ||
| Lilac Ribbon Rose Necklace |
To view more of my Ribbon Necklaces and Bespoke Jewellery Here
- Posted using BlogPress from my iPhone

nice one!
ReplyDeleteThse ribbon necklaces are beautiful. So flowing and unique.
ReplyDelete