Showing posts with label Polymer Clay Beads. Show all posts

Monday, 14 June 2021

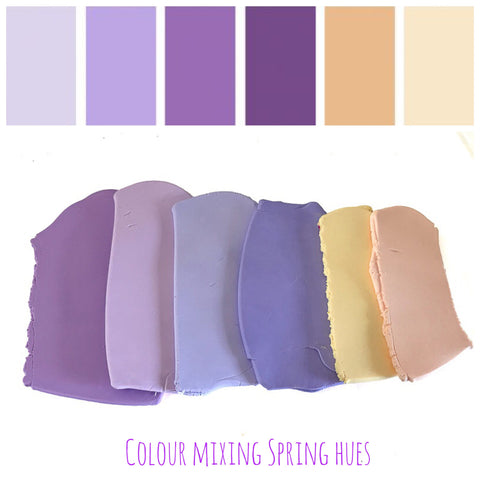
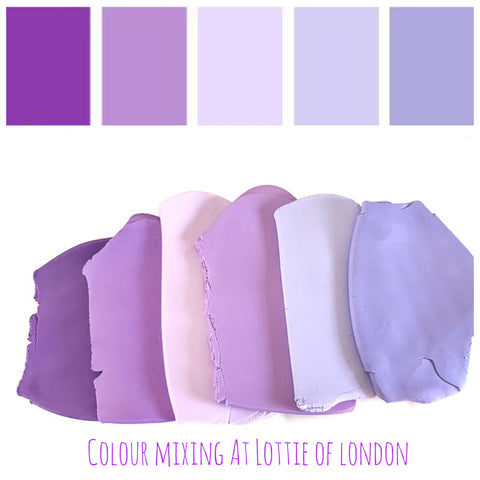
Colour Mixing Purple Hues for Spring at Lottie Of London Jewellery


I grabbed a few hours this week to work on my next colour mixing project for Spring, ultra violet is 2018's Pantone colour of the year and as I haven't had the opportunity to work many purples into my creations this was the perfect time.

Pantone Colour of the year 2018


So here's the first of my colour mixing venture with purple hues, I wanted to keep these light for the upcoming spring and summer season.

colour mixing purple hues at lottie of london jewellery


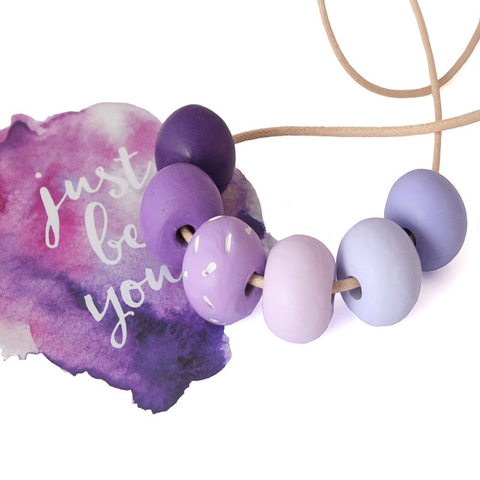
I think this makes the perfect combination for a new addition to our long statement necklace collection.

Purple long bead necklace colour mixing at lottie of london jewellery


I also tried another purple colour mix as seen below with two additional colours, a soft peach and yellow hue.  I love this combination its reminds me perfectly of spring especially crocuses. 

colour mixing purple hues at lottie of london jewellery

I've yet to create something with this colour combination but I am thinking a Klimt design would be perfect to capture all the colours.

In the meantime our new Purple Long Bead Necklace will be available for purchase from the 22nd March so keep your eyes peeled for our latest addition.


purple long beaded necklace at lottie of london jewellery

Introducing Polymer Clay Colour Tutorials


 Read more about out statement necklaces here


This Blog post was orignally published on18/3/2018 at LottieOfLondon.co.uk/blogs

Tuesday, 11 August 2020

Red Long Statement Necklace Commission | Polymer Clay at Lottie Of London


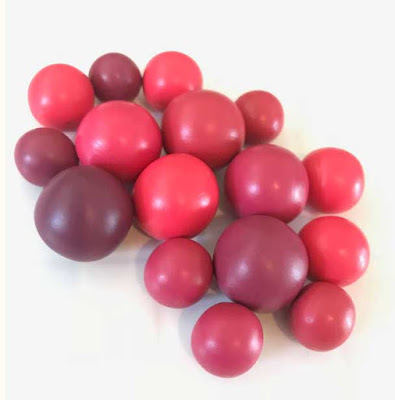
Colour mixing red polymer clay beads | Commissions at Lottie Of London
Blog post taken from Lottie Of London Jewellery Blog 06/10/2017

I love to colour mix at Lottie Of London Jewellery and my recent commission request was no exception.

I was asked to create my popular long statement necklace with red hues to coordinate with a clients coat.

When mixing primary colours such as green and blue you can shift the colour to lighter or darker resulting in a pale blue or navy blue for example. Working with red is a little different although adding black will darken a red into burgundy, adding white will quickly start to turn the colour pink and yellow will shift the red into a coral hue before becoming orange.

So it was decided to stick with the obvious bold red and shift into burgundy.

So after some colour mixing and testing I created a selection of seven red hues for my client to make her final selection, as seen below.

Once the final colours had been decided I set about creating the necklace and matching drop earrings.

Commissions at Lottie Of London Jewellery


You might also be interested in 


Thursday, 20 October 2016

Colourful Beads for our Long Statement Necklaces


It's been a busy day making up these colourful beads for my Long statement necklaces, now it's time for some buffing and polishing

Monday, 5 September 2016

Playing with Polymer Clay this Weekend! Ring Dishes, Beads and More


This weekend I spent it entirely playing with the clay, weekends like this are so few and far between!

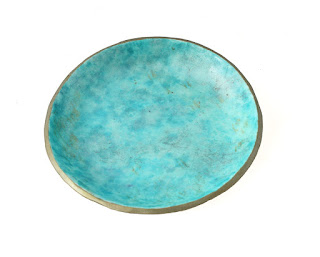
I created some new Ring Dishes, as seen above to replace my collection as they are proving very popular, I really enjoy experimenting with the inks to create different effects. 


I also created some new beads for a new Chunky Statement Necklace here


New Polymer clay beads for Autumn

The colours are created from another colour mixing adventure, this time in more muted Autumn tones for the coming season.


I also had an order to complete for despatch my Leopard Print Statement Ring and created some new studs with a new cane I created recently.


Leopard Print Rings and Stud Earrings with my new cane


Monday, 2 December 2013

Polymer Clay Beads with Big Bead Little Bead

Well December's here and now the mad rush has started not only to get all your own pressies in but also for me to get all my incoming orders out.

But in between this mad rush I just wanted to let you know about my new partnership with Big Bead Little Bead.  I am very happy to announce that they are now stocking a selection of my handmade polymer clay beads.

Here are a selection of my filigree swirl polymer clay beads in black and white.

My Black & White Filigree Polymer Clay Beads, handmade by Lottie Of London
My Black & White Filigree Polymer Clay Beads

 And my traditional millefiori and klimt polymer clay beads in tones of bronze and beige.

My Bronze Millefiori & Klimt Polymer Clay Beads, handmade by Lottie Of London
My Bronze Millefiori & Klimt Polymer Clay Beads

Big Bead Little Bead is an online bead shop that sells a great selection of beads and findings for jewellery making but especially unique in that they stock a beautiful selection of handmade artisan beads ranging from ceramic, polymer clay, lamp work, paper beads and more.

White of Black Filigree Polymer Clay Beads Available now from Big Bead Little Bead, handmade by Lottie Of London
White of Black Filigree Polymer Clay Beads Available now from Big Bead Little Bead

Offering a great opportunity to artisan bead makers to be able to show and sell there designs to a wider audience but also for jewellery maker/designer it is wonderful to be able to include some really unique pieces to your designs.

Black on White Filigree Polymer Clay Beads Available now from Big Bead Little Bead, handmade by Lottie Of London
Black on White Filigree Polymer Clay Beads Available now from Big Bead Little Bead
I am really excited with this new venture and am looking forward to sharing my bead designs and working with Big Bead Little Bead in the coming new year.

 Have a great Monday Everyone and don't forget to check out more great crafter's over on Handmade Harbours Handmade Monday

Sunday, 18 August 2013

Polymer Clay Whats Cooking

This week I've had a sort through my clay canes some have been dispensed of for scrap clay, but I've used some others for my polymer clay ear studs and rings.

Old polymer clay canes resigned to the scrap pile
You may recognise a few already as my millefiori studs and rings are proving quite popular I've had to make more for my Etsy Shop.  Some are new though, well new styles from old canes, once cooked I'll know which ones will work well or not.

Polymer clay focal's for ear studs and rings
I've also been playing around with some more clay firstly I tried out some rose studs in some alternative colours a dark blue and green brushed with gold, but I'm not entirely happy with these.

I also got my urchin mould in the post this week all the way from Canada as you can see below I had a little practice with them, its a fantastic mould though as usual my alcohol inking technique needs some work I always find my colours come out a bit too intense.


Polymer clay roses and urchins
I'm now awaiting another delivery of crystals to play with some new alcohol inks and more white clay so I should be having a fun week experimenting.

This post is part of Handmade Monday, why not pop on over to Handmade Monday and check out more great crafter's over on Handmade Harbours Handmade Monday

Sunday, 9 June 2013

Polymer Clay Playing with Ideas

This week I have finally picked up the clay again, but was abruptly halted when my clay extruder gun decided to die on me! As I was mid flow in my making I had to promptly order another and am now eagerly awaiting its arrival.

Preparing my clay colours for extruding


However it did'nt stop my flow and Tuesday I was working on some new ideas that popped into my head, I usually have to make a note of them otherwise they will be lost in the mess that is my brain.

My Idea Book for all my scribbles

Here are some prototypes of some pieces I am working on I needed to create some rough versions to see how they would work once put together.


Prototypes for some new Brooch ideas

I also got round to creating some earrings with those faux jade elephants I made in my blog post Polymer Clay Faux Jade.

Giveaway Faux Jade Polymer Clay Elephant Earrings

I've teamed them with some green aventurine gemstone beads and kept them simple. 

I have a few pairs so this week I will be having a giveaway for the chance to win a pair of these adorable earrings so don't forget to check back soon.

UPDATE The Giveaway is now running pop on over to my GIVEAWAY POST to take part

This post is part of Handmade Monday don't forget to check out more great crafter's over on Handmade Harbours Handmade Monday


Monday, 13 May 2013

Polymer Clay Lava Beads Tutorial

Here's a simple tutorial for Polymer Clay Lava Beads, perfect if your new to polymer clay and finding your feet with new techniques.

Lava beads are created using polymer clay and sea/rock salt to create a wonderful effect all over the beads resembling lava.

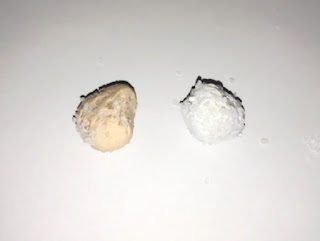
To start all you need is some sea or rock salt, scrap clay and some clay in the chosen colour for your beads.

Polymer Clay Lava Beads Tutorial - Prepare all your items ready to start

My polymer clay beads ready for salt application
 Once you've created your beads using your scrap clay and outer colour layer (above), start applying the sea salt to your beads by either rolling and squishing the salt into your clay or applying the salt to the beads by hand, you will probably find that your beads will lose there desired shape as you apply the salt into the clay as seen below.

 
My Polymer Clay Lava Beads with sea salt applied loses its shape

 Because I want my beads to be round I gently re-rolled them between my palms this helped to embed the sea salt deeper into the beads which creates a deeper effect, it also give you the opportunity to see if you want to apply more salt to any large gaps on the beads.

 
My polymer clay lava beads have been re rolled, embedding the sea salt

Once your happy with your beads its time to create your bead holes and cook them.  Once they are cooked and cooled simply place the beads into a glass of water and leave them to allow the sea salt to dissolve.

My polymer clay lava beads placed in water to dissolve the salt

It does'nt take long for the salt to dissolve so dry your beads off and they will be ready to use, here's how mine turned out below.

My Polymer Clay Lava Beads

This is quite a nice and simple technique which I plan to use for some future designs.

I would also like to take the opportunity to apologise for my photo quality here, unfortunately my camera decided to die on me and I had to use my phone, sorry.

This post is part of Handmade Monday don't forget to check out more great crafter's over on Handmade Harbours Handmade Monday

Sunday, 10 February 2013

Faux Jade Polymer Clay

There are many different Faux techniques for polymer clay and as this years colour of the year is Emerald I've decided to go with the Green Theme and make my first attempt at Faux Jade.

To make faux jade you need to make two different shades of jade one light and one dark.

Faux Jade polymer clay colour mixes

The recipe for each faux jade that I made are as follows -

Dark Jade
1/4" Chocolate x1
1/4" Green x1
1" Translucent x1

Light Jade
1/4" Chocolate x1
1/4" Green x1
1" Translucent x3


I must point out here that I didn't have any green only tropical green, which I think has created a brighter jade.

Next you need to cut up each colour of jade using a ribbon blade, if you don't have a ribbon blade a grater could also be used.

Faux Jade polymer clay cut up using a ribbon blade
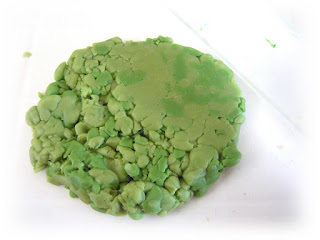
Once you've cut up both shades of your faux jade, mix the pieces together and roll flat with a roller, you could cut up this mix again for a more speckled look.  I decided to cut my mix once for the beads created below.
Faux Jade shades combined and rolled

Once you have your faux jade mix you're ready to go and start creating whatever you like.  Here's some beads and elephant charms I created from my mix.

Faux Jade polymer clay beads and charms faux jade tutorial
Faux Jade polymer clay beads and charms


Faux Jade polymer clay elephant charms faux jade tutorial
Faux Jade polymer clay elephant charms


I think maybe using the tropical green has made the beads quite bright and its not so easy to see the colour variations between light and dark in my mix.  I guess that means I'll have to have another go :)

I also found that you can only mix & roller your blend a couple of times before the colours start to blend together and you will lose your colour variation.

Have a great Monday Everyone and don't forget to check out more great crafter's over on Handmade Harbours Handmade Monday

Monday, 12 November 2012

Geometric Faceted Polymer Clay Beads


Its always the way, you get an idea in your head but despite looking wonderfully simple the process and technique is anything but!

I wanted to make geometric beads for a necklace,  so turning to one of my very first books for polymer clay How to make Polymer Clay Beads by Carol Blackburn, she has a easy, or so I thought tutorial for making geometric clay beads.

Now in Carols book her beads are perfectly geometric, but this technique is not as simple as it seems.  I just couldn't get them right, here is my initial process.

Polymer Clay Beads rolled into squares

Polymer Clay Beads - I sliced away the side of the bead to make them more square with sharper edges

Slicing away - Creating geometric polymer clay beads

Now heres where it went wrong you need to slice away at the corners to make your geometric beads, needless to say I didn't get a picture of the disastrous final beads, they was just not a uniform shape and in my frustration I kept re rolling and trying again, which took me a good part of the day, I blame my non mathematical brain for this.

So I turned to google, searching for geometric or faceted beads and found two wonderful tutorials on faceted beads.

DIY Glittery Facted Beads by Hazel & Agnes
DIY Geometric Necklace by Alicia on Dismount Creative

So putting aside my need to conform and make the beads uniform I proceeded to try again.

 
Polymer clay beads shaped into squares
Again I made my round beads into square shapes, however this time i did not cut away at the sides to make them with sharper edges.


Faceted polymer clay beads - slicing away at the edges
 I proceed to cut away at the each edge once the edges where sliced my cuts became more random to create a faceted shape I was happy with.


A faceted polymer clay bead
Here is one of my finished faceted beads the shape is a lot more free form than a geometric bead.  A quick note don't get too slice happy with your blade, or you will end up with very small beads.


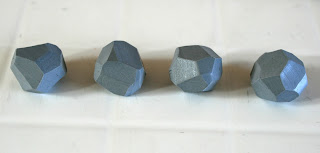
My faceted polymer clay beads
My completed beads together are a lot more random in there shapes and no two are exactly the same.  Before piecing a hole through these beads I placed them in the freezer for 30 mins to chill this helps when piercing as it prevents you from distorting the overall bead shape.


Grey Faceted Polymer Clay Necklace


And here is my finished necklace just as I had envisioned, I wanted a simple colour with one bright, bold round bead to compliment and stand out.  I used Titanium and Bright Chartreuse from Pantones Fall 2012 colours.


Grey Faceted Polymer Clay Necklace

This post is part of Handmade Monday with Handmade Harbour

Resources
  1. DIY Glittery Facted Beads by Hazel & Agnes
  2.  DIY Geometric Necklace by Alicia on Dismount Creative


Sunday, 23 September 2012

Faux Lampwork Glass Beads with Liquid Polymer Clay

As some may know before discovering polymer clay, I was very keen to try glass lampworking,  alas in my tiny apartment it was not to be and so I discovered polymer clay in my quest for making beads.


Well it is possible to imitate lampwork glass beads using liquid polymer clay, if you search the internet you may find tutorials and projects limited for this technique and having tried it once before myself and failed I can see why, its very tricky and fiddly though the clayers that have perfected this technique the results are amazing.


I am going to use a project from my book Polymer Pizzazz by Bead & Button.  The project is Grapevine Beads by Carly Seibel and uses translucent liquid clay with oil paints, its also worth noting that this method uses a different technique in that the oven is used rather than a heat gun.

For this project I'm not going to be doing the grapevine as specifed in the project I'm going to try some poppies instead.

Translucent Liquid Polymer Clay TLS

Its important to mix only a small amount of liquid clay with a fair amount of liquid clay in the desired colours you will be using, as I am going to be doing a poppy design for me this will be red, black and two shades of green.


My acrylic painted background sheet on polymer clay


My background sheet used to cover my bead bases was painted and decorated using Lumiere acrylic paints.


My polymer clay beads bases are wrapped in my background sheet


Once dry i covered my bead bases and shaped them into the bead shape I wanted to use, in this case ovals they are cooked for the time recommended for the clay you are using.


My polymer clay beads are painted with the TLS & oil paint mix

Once the beads are cooled they are ready to be decorated with your liquid clay and oil paint mix, here is my decorated beads almost complete


And here are my final finished beads the two smaller beads did'nt quite turn out right and the flowers where too close together.

My faux lampwork beads with polymer clay


My finished larger focal bead, its worth pointing out here that once you add the varnish to the beads it really does add to the appearance, also my photos have been lightened considerably to show you the effect, the beads are actually quite dark.


My faux lampwork focal bead with polymer clay

This is a great technique for achieving the faux glass lampwork appearance with polymer clay though possibly more suited to an advanced clayer and those who are familiar with liquid clay.  Personally I feel the beads came out too dark, this I believe is to do with the black background I used, with better planning of colours and a white background the end results could be quite different.
 
If you would like to learn this technique with the full detailed tutorial instructions please refer to my resource list below, I would highly recommend this technique as its a great one to learn and once you do and have the time you could really plan to create some amazing beads.

I have a couple tips if you are going to try this project.
  • Make sure you use the smallest amount of oil paint to liquid clay as it will only cause problems when cooking and not dry properly.  The balance is very important as I found out with my lighter shade of green.
  • I would highly recommended when taking on this project you make sure you are undisturbed, get rid of the kids and any other disturbances that will distract you from this project it is time consuming and requires your full attention as I unfortunately found out when I had to start preparing dinner.

Resources


This post is part of Handmade Monday with Handmade Harbour Pop on over to see more great handmade blogs
Monday, 18 June 2012

What to do with Alcohol Inked polymer clay scraps

Using Up Scraps of Inked Polymer Clay


Following my recent post on  Polymer Clay Swirl Beads in which I created a necklace using swirl lentil beads, I have been left with some left over scraps of inked clay.

Incase you have'nt seen my post, I created sheets of clay using metal leafing and alcohol inks which was used to create my beads for my necklace below.

Polymer Clay Necklace with swirled lentil beads


 I was left with with a few random scraps , as you can see, now more often than not my scraps would go into my scrap pile for forming the base of my beads, but with these inked scraps they are still usable, heres what I done with them...

 As you can see the scraps of clay are in many shapes, the larger sheet I tore into strips also.  I used the strip scraps to cover base beads totally and then rolled them out so they blended in.

This is pretty much the same as the watercolour torn paper effect used by  Maggie Maggio.


Here's some more examples of what I made using my scraps ...
 
Some simple round beads with torn strips applied


Some swirled lentil beads


Swirled heart charms created from lentil beads, and two pendants using various scraps of inked clay


So why not have some fun with your scrap clay and see what you can make...

Part of Handmade Monday with Handmade Harbour