Saturday 31 March 2012

Image Transfer on Clay Part 1

Everybody has there niches in clay mine is millefiori caning and everybody has there there pitfalls and at the top of my list is probably Image Transfer

When I first was introduced to image transfer my initial impression was that it would be 'so easy', however I was very quickly proved wrong and since my initial frustration at my first few attempts a few years back I have not ventured down that road again, until now...

Waterslide Image Transfers


First time round I used the waterslide image transfer sheets by Lisa Pavelka as you also get blank sheets of paper to create you own image transfers, great when you only have an ink-jet printer.


Attempts at image transfer on polymer clay
Waterslide Image Transfer Technique

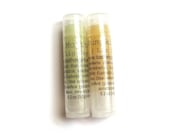
So what went wrong well here on the orange pendant I have bubbling, possibly from too much direct heat (I am unsure of the method I used for transfer) the second is better but still rough, almost dry looking.


So here I go again...
I'll be using the Lisa Pavelka waterslide sheets for practice as I have plans for some charm bracelets and pendants which require some images printed using the printer and I want to practice the technique first.

I found a great You Tube Video by Lisa Pavelka, demostrating how to use her waterslide transfers here.

Waterslide image transfer on polymer clay
Waterslide Image Transfer Technique

Both images have been applied to white clay which is best for maintaining the images true colour.

The lady has been created using the first technique of soaking the paper and slide and rubbing the transfer onto the clay (this is a pre printed transfer)

The beach hut is a transfer of my won printed using my printer onto Lisa 's paper also provided in the pack this had to be applied face down and rubbed well onto the clay before water application.

IMPORTANT NOTE Remember that when printing your own images, if they contain words to reverse the image to be printed or the wording will appear backwards (unlike me who totally forgot )

Waterslide image transfer on polymer clay
Waterslide Image Transfer Technique

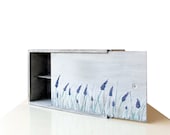
Here is another pre printed image, this time applied to gold clay as I am trying to achieve a more antique style to the image.  This image was also applied using the first method of sliding the image onto the clay.

Before cooking I made sure to apply a thin layer of liquid polymer clay, Here are my finished cooked pieces.

Waterslide image transfer on polymer clay
Waterslide Image Transfer Technique

The lady as you can see has wrinkled slightly and the beach hut has very little wrinkles at all, I believe this is because the beach hut was rubbed a lot firmer onto the clay than I rubbed the lady as can also be seen more obviously below

Waterslide image transfer on polymer clay
Waterslide Image Transfer Technique
I will need to test this theory with my next few attempts, I'm also interested in testing out the difference in thickness of liquid clay application.  Overall though I am very pleased with the beach hut result as this will be the method of application I intend to use.

Want to see my Jubilee Collection using Image Transfer New Jubilee Collection

Wednesday 28 March 2012

A Springtime Etsy Treasury

A lovely Spring Etsy Treasury by  Relogyyy featuring my Floral Beaded Bracelet

'Spring Aromas' by Relogyyy

Enjoy!


Glass Floral Wrap B...
$17.00

BOGO Sale Wooden an...
$28.00

Pastel Flower barre...
$15.00

Mason Jar Wedding C...
$120.00

Bird Photography 8x...
$25.00

Daffodils, blossom ...
$29.00

Circle Scarf- Upcyc...
$20.00

Amethyst and Pearl ...
$44.00

Always Natural Perf...
$12.00

salad green fancy a...
$45.00

2 Tube Lip Balm - G...
$8.00

March Madness Green...
$15.41

Distressed -Reclaim...
$49.00

mini coin purse min...
$15.00

Demantoid Garnet Ne...
$46.00

Antique Silverplate...
$35.00


A Quick Update

Hello, yes I am still here, I am swamped with work, last week I finally decided it was time to move on from my Beady Shop venture which I have invested many years into.  With the current climate, too many overheads and rising prices in silver, I believe this is the best option all round.  I am also finding that my passion for polymer clay and jewellery has been ignited and I want to be able to freely explore this new venture.

So please bear with me I do have a lot of lose ends to tie up, but I am really excited and looking forward to being able to clay more.

The Vintage Housewife


Friday 16 March 2012

Creating a Handcrafted Item of Jewellery Part Two

Catch up on Part One of Creating a Handcrafted Item Of Jewellery

Following on from last weeks post ... Here is Part Two of creating and finishing my handcrafted Ribbon Necklace

12.00pm Its time to sand and buff my beads, I use three grades of sandpaper and warm water with a tiny amount of washing up liquid, to give each bead a good sanding

three grades of sandpaper are used on my beads


12.35pm Once the beads have been sanded they need to be buffed firstly with denim as this helps to remove any remaining dust and residue from the bead and lastly with my hobby tool to create a beautiful matte shine ready for varnishing.

Buffing my beads with my hobby tool


1.0pm Once varnished the beads must be given time to dry.


6.20pm Back again ! The beads are now dry and are ready to be assembled to create the finished necklace.

Everything I need ready for finishing my necklace


 The necklace is carefully strung together with ribbon with each bead secured into place

Curling the ribbon and securing each bead

7.45pm And here it is my completed handcrafted necklace, in all to create this piece it took me a total of 2 days to complete allowing for breaks in between when the beads needed cooling or drying.

Lilac Ribbon Rose Necklace

Lilac Ribbon Rose Necklace


Lilac Ribbon Rose Necklace

 KEEP YOUR EYES PEELED.....  Over the next coming weeks I will be entering my Ribbon Necklace into a free promotional draw both on Here and my Facebook page.

To view more of my Ribbon Necklaces and Bespoke Jewellery Here

- Posted using BlogPress from my iPhone

Saturday 10 March 2012

Creating a Handcrafted Item of Jewellery ... Part One

Todays post is all about how I go about making my Ribbon Necklaces, its not a tutorial but an example of the time, care and attention I take in producing my work.

My Yellow Blossom Ribbon Necklace


Why ? After the recent copying fiasco between a well branded high street store and a designer brand and the mixed feelings raised on the subject, I felt that it was worthwhile showing how much time and effort I put into making and creating each of my jewellery pieces and for my existing customers to show how much care and pride I take in my work.

So for Part One....

9.00am Saturday morning, the old man is off playing SWTOR (a geek thing sorry) on the computer, this means I can get to work on my new ribbon necklace.  I gather all my pieces of scrap clay, the colours needed for mixing and my lilac rose canes made before Christmas.

Everything I need prepped and ready

I need to measure out the base of my beads from the scrap, I'm actually getting a lot better at working out my sizes now and have been making notes for focal jewellery pieces such as my ribbon necklace and millefiori oblate necklaces.

With the base beads prepared its time to prepare my colours for covering, making sure the colour combination is correct and the clay is of the thickness for covering each bead.

9.15am with the colours prepared and rolled its time to start covering each bead, at this point its important for me to make sure the sizing of each bead is correct before the application of the canes.

9.30am With the beads covered and ready for caning I place the beads in the fridge to cool as this will allow for better cane application and stop the bead from distorting and I can have a cup of tea....

Beads are ready for cane application


10.00am The beads are ready for the cane to be applied each bead is covered with various sized slices of my lilac rose cane.  Once each bead is covered its time to create the bead holes and shape the darker purple beads into oblates.

10.40am Bead have been prepared, shaped and are ready for cooking.

Beads are ready for cooking


11.10am Beads are out of the oven and cooling down I like to cool my beads in very cold water this really helps when using translucent clay as it will make the translucency clearer.

So until Part Two Next Week....
Continue To Part Two Now


Tuesday 6 March 2012

On My Worktop

Heres whats on my worktop today....


I've been working on another oblate necklace, a new flame red/orange millefiori cane and two colour samples of aqua green/peacock green and turquoise, I fancy trying my hand at some kaleidescope and shapeshifting canes in these colours too.