
During my week of blahhh, I decided I wanted to improve my product photos so that they have a pure white background, I've been currently using a large artist canvas outside in daylight with some photo editing with Picasa 3 to brighten the images. With the majority of my products this has been working really well and for some images the pictures edges still appear a little greyer than I would like.
 |
| Almost perfect - improving product photos - Polymer Clay Necklace |
 |
| Still a little grey around the edges - improving product photos - Polymer Clay Charm Bracelet |
Unfortunately with my latest creations I have struggled to capture the pieces at there best, the whiter I make the background, the more I lose detail on the product, they blur into the white background and so I have developed a real bee in my bonnet about getting the photos right and White!.
 |
| Far too grey for my liking - improving product photos - Polymer Clay Necklace |
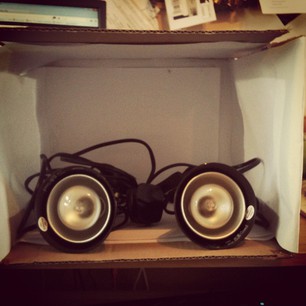 |
| My handmade cardboard light-box - improving product photos |
Despite many attempts and much fiddling my photos where either too yellow or too blue, after my lovely husband worked out how to change the white balance on my camera, I thought I had it set but alas it still did not work. I then decided to go back to trying the canvas with the balance adjusted and trying out taking photos at different times of the day for comparison.
It was at this point, I became very frustrated and found myself hunting down new cameras within the price range of £500, after all a camera at the price has to be good right?
Then late on Saturday night, whilst browsing and catching up with blog posts I discovered one on photography by CraftBlog UK - Craft Photography Tips, its a brilliant post on craft photography and also provides links to more phorotgraphy tips, including Hilary's of CraftBlog UK own posts on the subject. Hilary herself is a keen photographer and her posts on photographing with a mid range compact camera have really opened my eyes that there is so much more to learn than just pointing and clicking, I obviously have a lot to learn.
My current camera purchase has now been put on hold and I am determined to learn how to use my current camera to the best of its capabilities, to fully grasp and understand the different settings so that if I do purchase a new camera in future I will be fully aware of what I need from it, rather than presuming that the higher the price the better the camera.
 |
| Learning how to use my camera to the best of its capabilities - improving product photos |
Resources
- Craft Photography Tips by CraftBlogUK
- How to make & use a lightbox to improve your product photography - Handmadeolgy
- How to create an inexpensive photography lightbox - WikiHow
- Build a photo lightbox - Wired
Hope you get there with your photography. I've been messing around with tin foil on sheets of card to reflect and banish dark shadows, especially in this grey weather!
ReplyDeleteYes I was recently reading about using foil to reflect the shadows, I must dig some out and give it a go.
DeleteIt's so hard isn't it? I know some people use "cutting out" on PhotoShop (cut outs are often preferred by magazines for their product pages) but I've never got my head round this! At the moment I use a white artist's canvas, too, but only because I have so many knocking around waiting to be painted! It's far from perfect, though.
ReplyDeletethe photos look great keep up the great work
ReplyDeleteI am afraid to go too far into this as when I start I am afraid that I won't be able to stop! I know that it is really important and I suppose that I must do it soon. Thanks for the links - will check them out.
ReplyDeleteI think the photos look really good.It's so hard to get it right!
ReplyDeleteI've had a lot of trouble with photography in the past too. These days I use a big white piece of paper and take the photos in my kitchen when it's slightly cloudy, so there is plenty of light but the clouds stop any harsh shadows appearing. I then edit out the background and add a very very slight grey background.
ReplyDeleteWas quite suprised to see what camera you use. Turns out we use the same brand, although I think they are slightly different models. You won't need to spend £500 on a new camera. I only spent about £70 on mine and I think it's fantastic.
this is a great post - thank you! i am very familiar with all the problems you have described. Like you, i take my photos outside and have also recently decided to start only using a white background. I also am coming to the conclusion that i must learn more about how to use my camera properly! I have heard about using foiled sheets to reflect light too and will give this a go.
ReplyDeletethanks for all the tips and links! x
Hi. The top photo is fab. I also struggle on the paler colours that don't stand out against the white background. Have you heard of fotofuze.com? You upload your images and as if by magic you can give them a white background!
ReplyDeleteThank you, I had not heard of fotofuze.com, I've checked it out and will book mark it for future use,unfortunately I still lose the some of the detail on my paler necklaces but it will work great for my darker ones :)
DeleteI found your post about photography really interesting. Thanks for posting
ReplyDeleteI too struggle with photos this was really useful. I keep saying to my husband I need a better camera but from reading this I think I may just need to learn how to use mine better. Thankyou
ReplyDeleteFirst, I like the texture of the canvas behind your things, I think it adds interest without distracting. Makes them look real instead of studio-ish. Very nice. Second, on to cameras, I think whichever one you get comfortable with that gives you what you want. Sometimes I get a good image with my IPad...LOL I usually use my D60 (Nikon) because I've been using it so long and I know it inside and out. But I have a better one (D7000) but I'm not as good with it, so the photos I take with it are never as good. One day I will actually do some tutorials to get better with it.
ReplyDeleteAnyway, I thought your images were very good. Hope you're feeling better.
A very interesting read, thank-you for sharing. I'm off to explore your links. Have a good week-end. Jo x
ReplyDeleteHiya, great blog Lottie. I've shared you in my list of blogs on http://theoldbutton.blogspot.co.uk/2012/09/loving-blogs-craftfest-i-love-your-blog.html
ReplyDeleteAll the best for CraftFEST